
Tuscan Oatmeal Loaf
After my struggle with the artisan bread, I decided to make a variation of a Tuscan Bread to lift my spirits and remind me what a good bread tastes like. I used leftover oatmeal for the bouillie, which results in a great tasting but much flatter bread than is usually expected from the original recipe. (If one was to follow the recipe as written below, you will get a bread 1/3 more domed than in my pictures.)
The author of the Village Baker, Joe Ortiz, has my favorite Tuscan bread recipe that I started with years ago. My most successful unsalted breads have been a variation of his recipe. I recommend his book for any bread maker, and here is his recipe. I have included a little of his intro as I think this is a gem of bread theory.
Panne Tuscanno
Tuscan Bread
The boullie (mush) process breaks down the gluten in the flour, resulting in a wilder texture; it also brings on a fermentation that produces a more earthy flavour in the bread.
Makes 1 round, 2 lb. loaf
6 cups organic, unbleached white flour (or all purpose)
1 3/4 cup boiling water
1 pkg (2 1/2 teaspoons; 1/4 oz.) active yeast
1 1/2 cups warm water
To Make the Bouillie, place 2 cups of the flour in a bowl or container and pour the boiling water over it. Let the mixture sit for 5 minutes, then mix to incorperate, making sure there are no dry spots. Let the bouillie sit overnight covered with a damp towel. The bouillie should rest for between 15 and 24 hours. It will not have risen at all, as it will still be a moist porridge.
To Make the Dough, proof the yeast in the warm water. Turn the bouillie into a large bowl and add the yeast mixture. Stir until the entire mixture becomes a paste that is somewhat smooth and soupy enough to be beaten vigorously with a wooden spoon.
Add the remaining 4 cups of flour, a handful at a time, working the pasty mixture... until it is smooth and satiny. eventually it will form a medium-wet dough and you should still have several handfuls of flour left. Using up the rest of the flour, knead the dough for about 8 to 10 minutes on a worktable.
Let dough rise, covered, for between 1 and 1 1/2 hours, until it has doubled. Shape the dough into a round, irregular loaf by flattening it and then folding the edges toward the middle and sealing the seams with the heel of the hand.
Let the loaf rise for 30 minutes. Then, with the palms of your hands, flatten the loaf a few inches so that it is half its original height, and flip it over onto a well-floured surface. This helps give the dough its irregular shape. Cover and let the loaf rise for another 30 minutes.
Then pick the loaf up off the table and, with your hands, stretch it out by a few inches. Bake the loaf on a baking stone in a preheated 400F oven for between 45 and 50 minutes. Or the loaf can be baked directly on a baking tray. Shut off the oven and let the loaf remain inside for 5 minutes to develop the crust, which should be golden and firm to the touch.
Rough dough, Tuscan Oatmeal Loaf
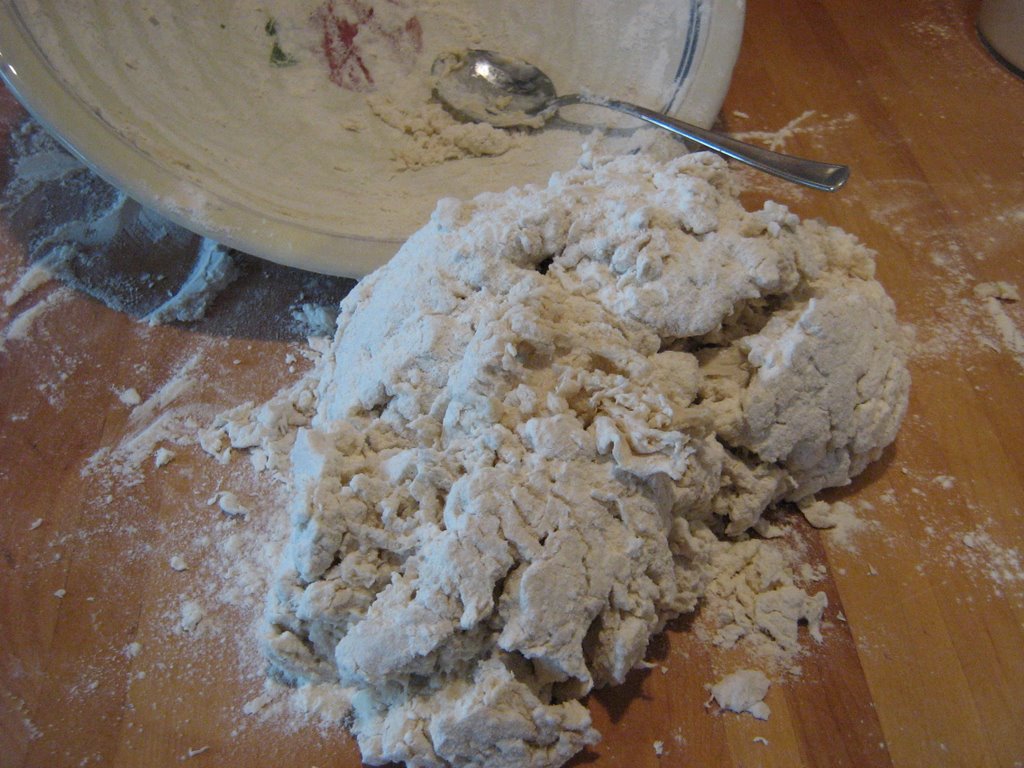
In every recipe I do, I stir most of the flour in until it looks like this, reserving one cup of flour to dredge the table when needed. I love how the dough looks an utter mess, and then within about 10 strokes of kneading it becomes a well behaved dough.
Oven ready, Tuscan Oatmeal

You can see this is a pretty big loaf, approx. 10 inches across, unbaked. Sometime I bake this recipe as two smaller loaves.
Profile, Tuscan Oatmeal Loaf
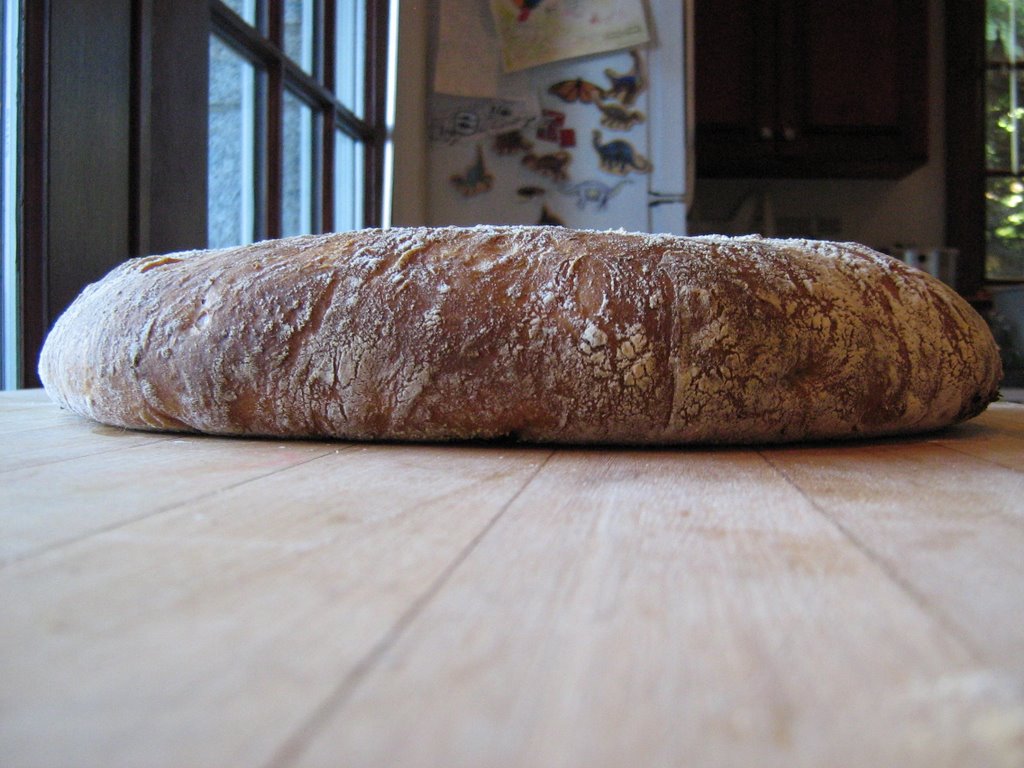
You can see here that I got a little "spring" from the heat of my baking stone and a splash of water in a pan on the shelf below to give the oven a blast of steam. (Spring is how much the bottom of the loaf comes off the bottom surface of whatever you are baking on. If you have good spring you have the potential for a nice rounded loaf - unless you use one third of the grain in oatmeal like I have - the result is a flatter loaf because there is less gluten from all that oatmeal)
Interior, Tuscan Oatmeal Loaf
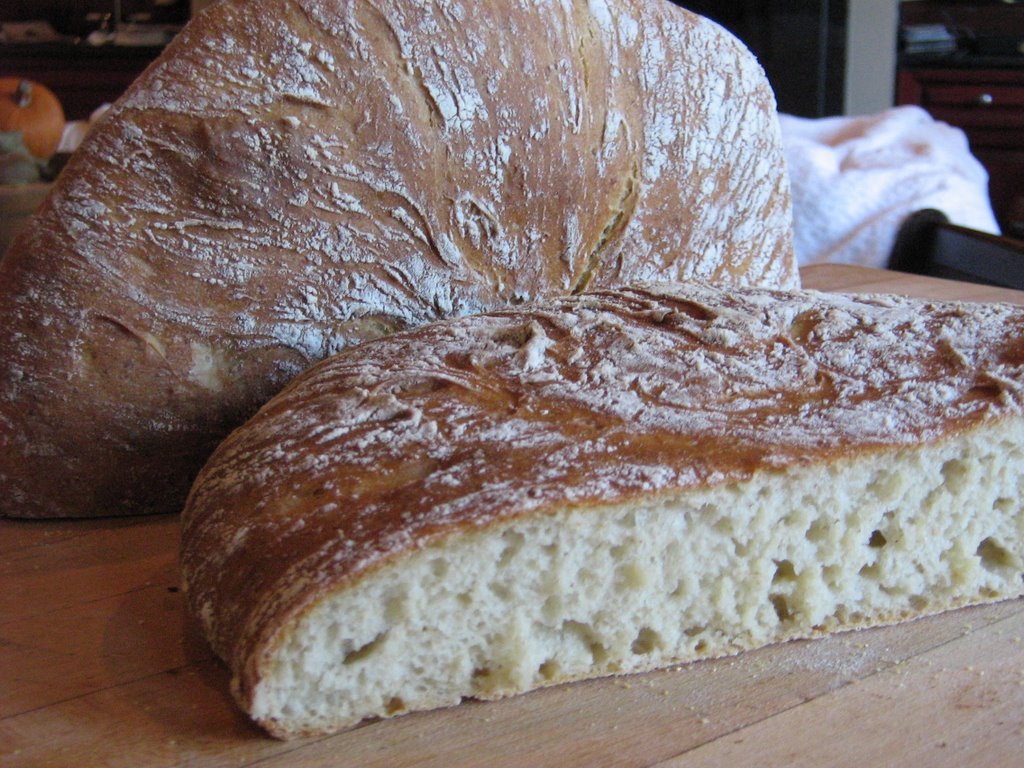
I cut into this bread when it was hot from the oven - I couldn't wait to eat it. Because of this the interior crumb and bubbles are not as defined as they should be.
posted by Underground Baker at 11:15 AM
![]()

9 Comments:
Wow, that looks so good!!!!!!!!
Oh god that looks delicious.
Great pictures, I can alomst smell the bread. Good close up of the gluten!
Thanks guys. I'm making a garlic and walnut fougasse today, I'll post the pictures within the next few days.
Hey Candy, I took a photo for you of a warm piece of bread slathered in butter, but couldn't load it with this series. I had put the post in edit (saved it for a few hours) and when I came back to it, it wouldn't let me load more photos. This has happened before - what is the problem?
I'm going to try this this weekend...I'm at 7,000 feet altitude - we'll see what happens! Looks soooooooooo good.
UNderground, I don't know what happened, I don't think I've tried to add photos in later to already posted notes. Why not just post the photo, then link the post you wrote about the contents of photo if you like? I love butter.
Diana, I am sure both Underground and I would be curious about your baking at that altitude! I know you really have to have a knack for it.
Hi Diana,
High means less pressure, right? So maybe you would get a little more height if you decided to use leftover oatmeal instead of the flour bouillie. Let me know how your loaf works out!
I'll pop that pic up for you Candy.
Bread looks great. But I think it should be written "pane toscano".
OMG - this looks totally awesome! Just like something from the cover of my bread bible. Go you!
Post a Comment
<< Home