Here is a blog-full of bread.Enjoy, and don't hesitate to contact me to ask questions, or - heaven forbid - you find the recipes nonsensical.
Hearty Sprouted Wheat Bread
Hearty Sprouted Wheat BreadThis yeasted bread contains almost 75% sprouted wheat berries, the remaining wheat being added in the form of organic unbleached bread flour.
Ingredients3 cups sprouted wheat berries
1 ½ teaspoon sea salt
1 cup unbleached organic all purpose bread flour
1 ½ teaspoons dried yeast
1/3 cup water
1.
Stir ½ cup flour with the yeast in a small bowl. Save the remaining ½ cup flour for later. Add the water stirring until well mixed.
2.
In a food processor fitted with a steel blade, combine 2 ½ cups wheat berries with the salt until they form a partial ball in the work bowl. Reserve ½ cups of the sprouted wheat berries for later. This usually takes about a minute, letting the machine run for 10 to 15 seconds at a time. The wheat berries will become a course paste with some gluten-like strands forming between the clumps.
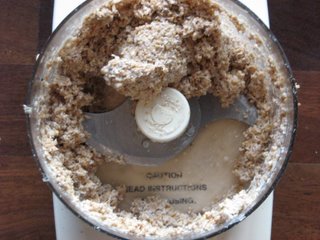
Grinding the sprouted wheat berries
3.
Dump the wheat berry paste into a medium sized bowl. Add the yeasted flour and the reserved sprouted wheat berries. Stir to combine, then add about 1/8 cup of the reserved flour, stir to combine. Turn the dough out onto a well floured counter, using approximately a 1/8 cup of flour. Knead the flour into the bread. Using flour sparingly, just to keep the dough from sticking to the counter and your hands, continue kneading until the dough forms a springy dough. This should only take about 20 presses, as the dough has already been “kneaded” in the food processor. You probably will not need the full cup of flour called for in the recipe.
4.
Place the dough in a buttered bowl. Cover with a damp cloth or plastic wrap. Allow dough to rise until 1 ½ times its original size. Reshape the dough with a few kneads, shape into a ball and place seam side up in a non-linting cloth lined bowl. Sprinkle generously with flour. Cover with the damp cloth or plastic wrap and let rise until almost double in size.
5.
Meanwhile preheat a baking stone lined oven to 400 degrees. When dough is ready, turn it out onto the hot stone. Slash a cross onto the surface. Bake for 40 to 50 minutes.
Unleavened Sprouted Wheat Breadthis is a dense, moist bread, sweetened both from the dates and the natural sugars produced by the sprouting grains. If you want it less sweet, don't add the dates.
Ingredients2 cups wheat berries
1 teaspoon salt
3 whole dates, pitted and sliced
3 to 4 tablespoons sunflower seeds
1. Cover the wheat berries with water and let sit immersed for 6 to 8 hours.
2. Drain berries from the water and let sit in a colander for approximately 18 hours, rinsing with water and draining regularly. When the wheat berries have sprouted and have about 1/8 of an inch of pale growth they are ready to use. If you allow them to grow for much longer than that, the resulting bread will taste a little grassy rather than the sweetish wheat flavour that makes this dense little loaf so good.
3. In a food processor fitted with a steel blade, chop/pulverize the wheat berries with the salt until they resemble mash and have a few gluten-like strands forming,(see above photo).
4. Transfer to a bowl and gently stir in the chopped dates and sunflower seeds.
Line a small loaf pan, (7 by 3), with parchment paper, and spoon into the prepared pan. Bake the loaf at 325 for 40 minutes.
Cool in pan for 20 minutes, remove and cool completely before slicing. Store in the refrigerator or freeze.

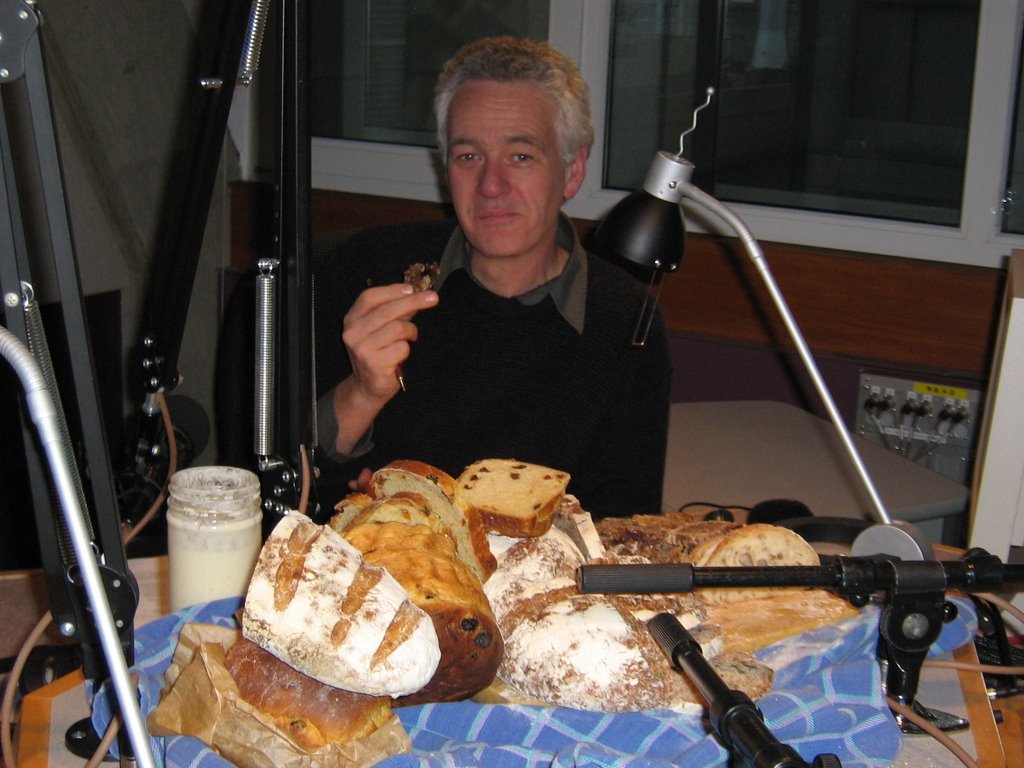
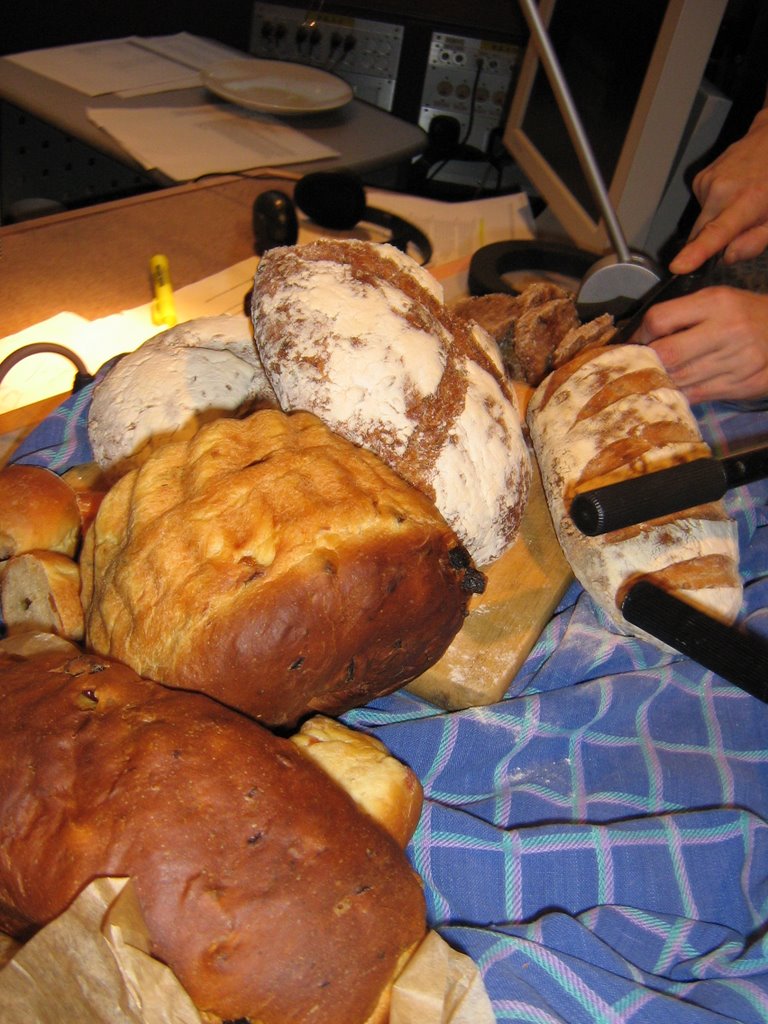
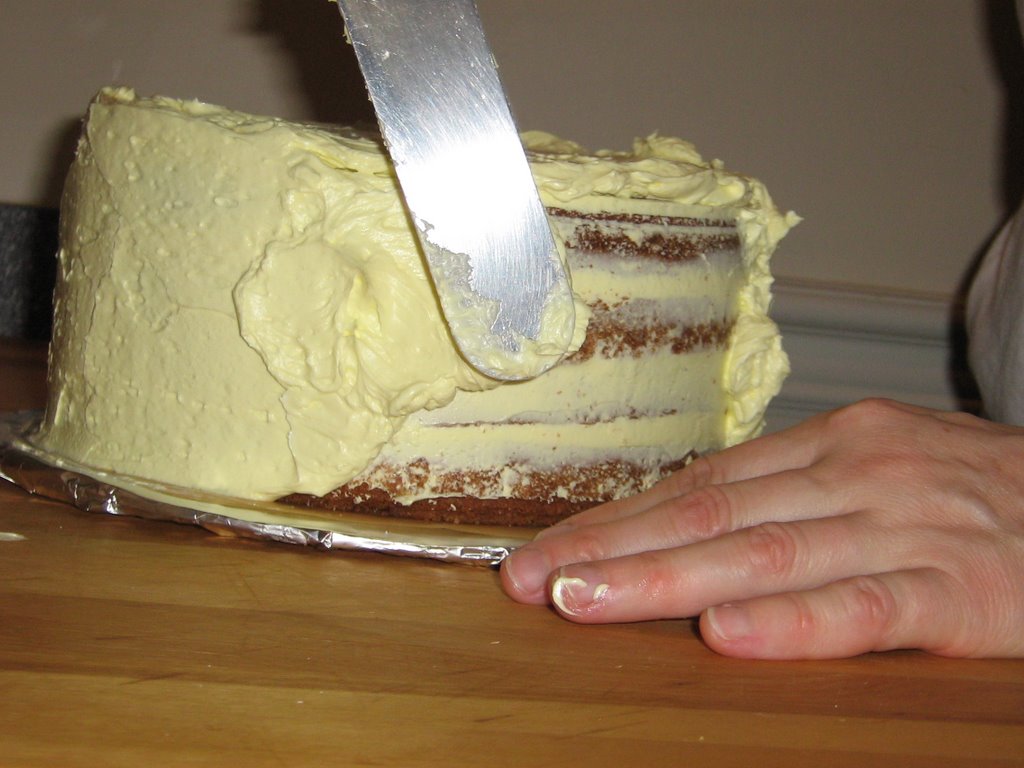
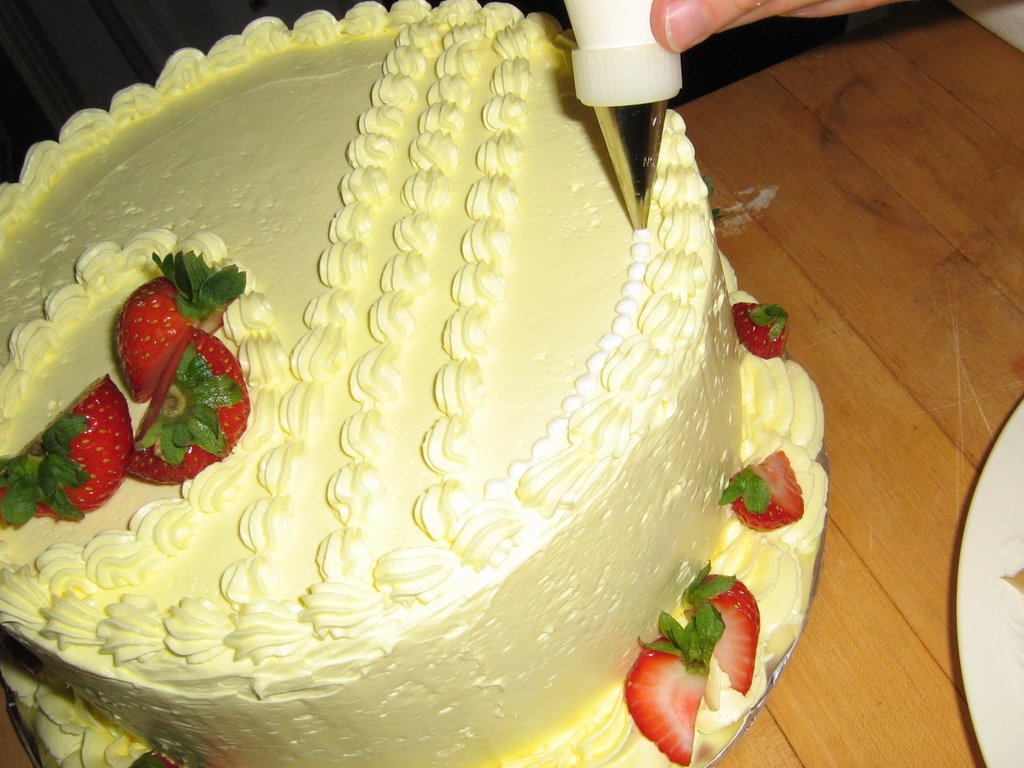
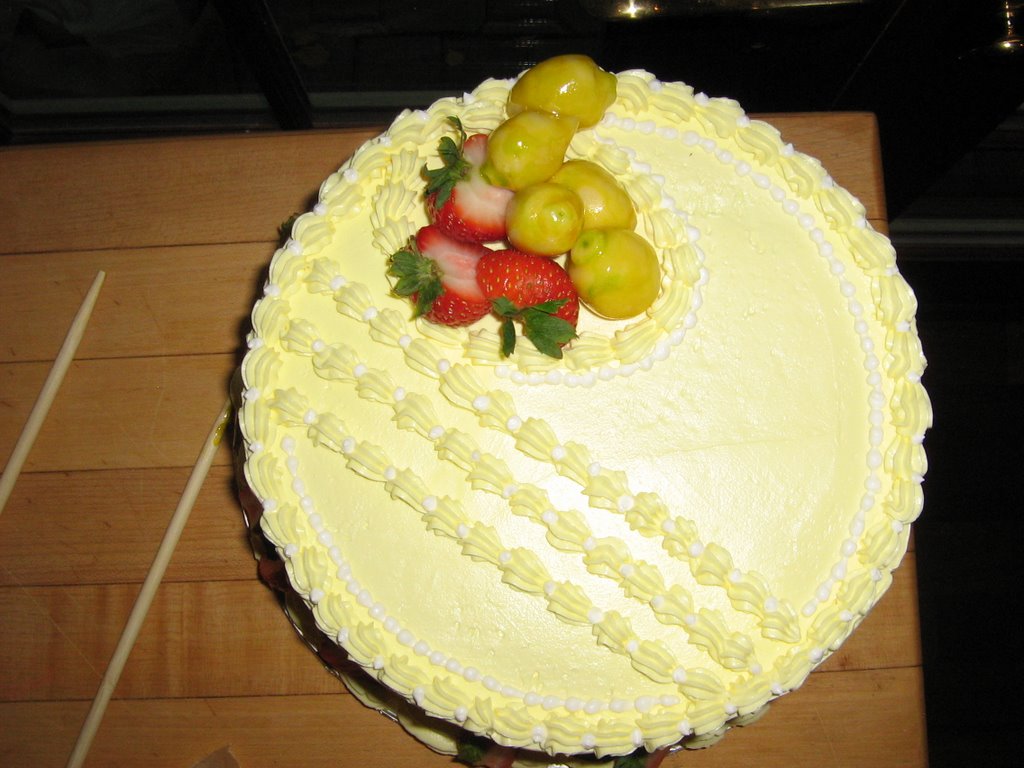
Assorted Shapes of Panettone
This recipe is from the
Bread Baker’s Apprentice, by Peter Reinhart. I highly recommend this book, especially for those new to bread baking who also like to thoroughly understand the process.
You will find a few of my comments scattered through this recipe. They will be italicized.
Also, the recipes for the barm follow the main recipe. My appologies in advance that I have given you a recipe that calls not only for a barm, but that this barm calls for a starter that takes a little under a week to make. It is worth it for the flavour.
PanettoneWild-yeast sponge1 cup barm, (see attached)
1 cup milk, lukewarm
1 cup unbleached all purpose flour
Fruit Blend2 cups dried fruit mixture (Reinhart uses raisins and candied fruit blend)
½ cup scotch (Reinhart uses brandy, rum or whiskey)
1 tablespoon lemon or orange extract
1 tablespoon vanilla
Dough3 cups unbleached all-purpose flour
3 tablespoons sugar
¾ teaspoon salt
1 tablespoon yeast
1 large egg at room temperature
1 egg yolk
4 to 6 tablespoons water
½ cup unsalted butter, at room temperature
1 cup almonds, slivered or chopped
1.
The day before making the bread, make the wild-yeast sponge. Stir together the barm, milk, and flour in a mixing bowl just long enough to hydrate al the flour and to make a sponge. Cover the bowl with plastic wrap and ferment at room temperature for approximately 4 hours, or until the sponge begins to foam and bubble, then put it in the refrigerator overnight.
2.
While waiting for the sponge to ferment, mix together the dried fruit, (raisins and candied fruit if you prefer), in a bowl. Add the liquor and the extracts. Cover the bowl and let this sit out overnight to allow the fruit to fully absorb the liquid.
3.
The next day, remove the wild-yeast sponge from the refrigerator 1 hour before making the dough to take off the chill.
4.
To make the dough, stir together the flour, sugar, salt, and yeast in a 4 quart bowl (or in the bowl of an electric mixer). Add the sponge, the egg, and the egg yolk. Stir these together (or mix on low speed with the paddle attachment) until they from a firm, but supple, ball. Add as much of the water as needed to form a dough. Stop mixing and allow the dough to rest 20 minutes to let the gluten begin to develop. Add the softened butter and the soaked fruit mixture and continue mixing until the ingredients are evenly distributed.
5.
Sprinkle flour on the counter, transfer the dough to the counter, and begin to knead (or mix on low speed with the dough hook). Knead the dough gently for 2 to 4 minutes until it is soft and supple but not overly sticky (it can be very tacky). Add flour if necessary ( you will probably have to sprinkle small amounts of flour continually as you knead to keep it from sticking to your hands, but use only the minimum necessary to allow you to knead without getting the dough all over your hands ). While kneading, gradually work in the almonds until they too are evenly distributed. The entire process, after the resting period, should take 6 to 10 minutes. The dough must soft and supple, tacky but not sticky. It should pass the window pane test, (
if you want this info, contact me – it isn’t necessary – you will be fine if you knead until the dough springs back nicely when you press it with your fingers ), and register 77 to 81 degrees, (
I don’t bother measuring the temperature. If it is a little cooler it rises slower. If it seems to be rising fast, find a cool place for the rest of the proof). Lightly oil a bowl and transfer the dough to the bowl, rolling it around to coat it with oil. Cover the bowl with plastic wrap.
6.
Ferment the dough at room temperature for approximately 2 hours. It will rise very slowly and should increase to only about 1 ½ times its original size.
7.If you are not using professional panettone papers, prepare pans as shown opposite, (
Well, you will have to buy the book if you want to see the pictures, and that’s not a bad idea. It is always good to support great books; there are worse ways to spend money! I did not use professional papers, and just generously buttered my muffin and small bundt pan and parchment paper lined a small loaf pan for the whole recipe).
8.
Divide the dough into the desired sizes. If you are making large 2-pound loaves, divide the dough in half and round the pieces into 2
boules, (Reinhart’s italics), as shown on page 72, (
see above note). Place them into the baking papers or into prepared pans 6’ in diameter, (
Here is a brief description of what Reinhart is talking about. Line the bottom of a 6” cake pan with parchment paper. Make a “crown” or collar for the pan by cutting a length of parchment long enough to go around the diameter of the pan, with some to spare, and an inch and a half higher than the edge of the pan. Tape to secure the parchment on the outside seam to keep the tape away from the food. Or you could do some fancy folding to seal the edge so you wouldn’t have to think about food-safe tape). Press the dough down slightly to spread it into the papers or pans. The dough should reach halfway up the forms. Mist the dough with spray oil and loosely cover the pans with plastic wrap. If you are making mini panettones, use individual-size baking papers or grease muffin pans and fill each cup half full. (You will not need to make parchment collars or bottoms for the muffins pans.) For large and small loaves alike, proof the dough at room temperature for approximately 2 hours, or until it nearly doubles and has risen just to the height of the papers or pans.
9.Preheat the oven to 325 degrees with the oven rack in the lower third of the oven.
10.
Bake large loaves for up to 1 ½ hours, depending on the oven; bake mini loaves for 25 to 35 minutes. The top of the dough may get very dark before the center reaches 185 degrees. If so, cover the tips with aluminum foil or a sheet of baking parchment. The finished breads should sound hollow when thumped on the bottom, be golden brown all around, and register at least 185 degrees in the center. If using baking papers, you mat leave the bread in the paper while it cools, but remove it from the pans. In any case, transfer the breads to a cooling rack and thoroughly cool before serving, at least 2 hours.
11.
These breads are best kept by wrapping them in aluminum foil after they completely cool. They can be stored at room temperature for as long as 2 weeks. (Some people keep them longer, but I think they lose quality beyond this point.) You can also freeze them for up to 3 months to save for special occasions.
The StarterLet me warn you now, this takes six days before you can make bread. But it is so satisfying.
This recipe started out based on Dan Lepard’s recipe, but of course over time it has developed into its own. Feel free to play with different flours. I usually substitute my new flours into the rye flour measurements.
Ingredients 2 tablespoons organic raisins
bread flour
rye flour
water
Day one: Combine the 2 tablespoons organic raisins with 2 tablespoons bread flour, 2 tablespoons rye flour and 1/2 cup water in a 1 quart glass jar. Cover loosely and let sit 24 hours.
Day two: The starter may have divided into two layers, liquid on top, sediment on the bottom. Add to the jar 2 tablespoons bread flour, 2 tablespoons rye flour and 2 tablespoons water. Stir to combine. Cover again for 24 hours.
Day three: The starter may have divided into three layers, with the raisins in the middle. The raisins will be very soft, and perhaps split. Add 4 tablespoons of both bread and rye flour and 1/3 cup water. Stir to combine, cover and sit for 24 hours.
Day four: You will see some fermentation now, and the starter will smell almost yeasty. Remove 2/3rds of the mixture. Stir in ¼ cup water then strain out the raisins. Add 6 tablespoons bread flour, stir well and let sit 24 hours.
Day five: You will now be able to tell that the mixture is fermenting. When you first uncover the jar it will smell a little sour. It may have a glossy sheen to its surface. Remove 2/3rds of the batter; stir 1/3 of a cup water and 6 or 7 tablespoons bread flour, until the starter is on the thick side. Let sit 24 hours.
Day six: The starter is now ready to use. Use up to ¾ of the starter to make your bread, and refresh the remaining ¼ by adding 3/4 cup water and 1 cup flour. Let it sit about 4 hours at room temperature, then store it covered in the fridge. Bring the starter to room temperature before using it for your next batch of bread. If you want to make a larger starter, over a few days increase you quantities of flour and water refreshments. Don’t forget to bake with, discard or give away ¾ of you previous starter when you do the refreshments.
Note: Once your starter is established, feed it regularly, or better yet, use it regularly. To keep your starter vigorous always remember you should always be double or tripling the volume of the starter when refreshing it. This will keep it healthy and vigorous!
Barm (as defined by Peter Reinhart)
This is kind of like a bigger, beefed up starter. Great for when you are planning on making larger quantities of bread.
Ingredients3 ½ cups unbleached bread flour
2 cups water
1 cup seed culture, (or starter as listed above)
Stir together the flour, water, and seed culture in a mixing bowl (you can discard the remaining seed culture (starter) or give it to a friend to build into his or her own barm). Make sure the seed culture is evenly distributed and all the flour is hydrated. It will make a wet, sticky sponge similar to a polish. Transfer this sponge to a clean plastic, glass or ceramic storage container with a lid or plastic wrap and ferment at room temperature for approximately 6 hours, or until the barm is bubbly. The plastic wrap will swell like a balloon, as will a plastic lid. When this happens, open the lid or release the plastic to let the gas escape (try not to breathe it as it escapes-the carbonic gas mixed with ethanol fumes will knock you across the room!). Replace the cover and refrigerate overnight before using. The barm will be ready to use the next day and will remain potent for 3 days. After that, or if you use more than half during the next 3 days, you will need to refresh it.
Chapati Indian Flatbread, easy to make, no rising time, and so good for dunking in soups as well as the obvious curries.
Ingredients2 cups flour
Generous 2/3 cup water
1 tablespoon vegetable oil
½ teaspoon salt
Melted butter and/or oil for cooking, or better yet, clarified butter
1.
In a medium sized bowl combine the flour, water, oil and salt. If the dough doesn’t absorb all the flour, add a little water, a few drops at a time until the dough forms a shaggy, rough looking ball.
2.
Flour the counter lightly and turn the dough out to knead briefly, until it forms a smooth-ish ball. This should take just a moment or two.
3.
Let the dough rest for a half an hour in the bowl. Cover with a damp cloth.
4.
On a lightly floured counter knead the dough for about 10 minutes, until it is smooth and springs back to the touch. Divide the dough into 10 pieces and form each of these into a ball. Let them rest, covered with the damp cloth, for 10 minutes.
5.
Once again on a lightly floured counter roll out each ball into as perfect a circle as you can muster. Stack them loosely with a generous sifting of flour between each layer on a small wooden board or plate. They can sit like this for a short time, (when I went to cook my chapati on the comal during the Almanac show, all of them had stuck together except one! I had been in a hurry and forgot to put parchment paper between the chapatis).
6.
Meanwhile preheat a cast iron comal, griddle or shallow frying pan over medium heat.
7.
Cook each flat bread on the hot griddle, first brushing the griddle with melted butter, (I like to use a mixture of 2/3 melted butter to 1/3 oil). While the first side is cooking I brush the second side with more butter. When the first side is puffed and has golden to brown spots on it, turn and cook the other side. Reserve in a basket until ready to serve.
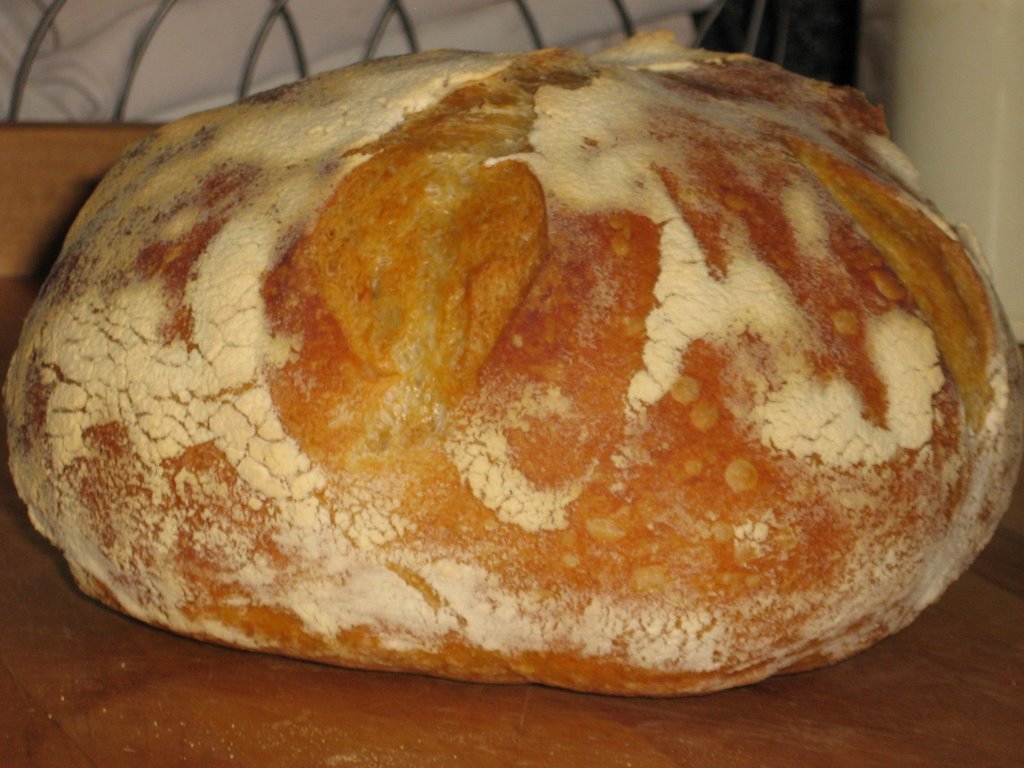
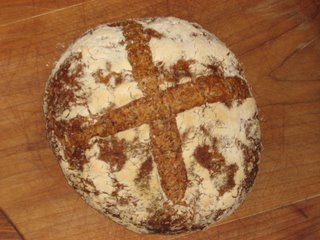
Here are some photos of the No-knead Bread that I made for Almanac, developed by Jim Lahey, published in an article in the New York Times by Mark Bittman. Try and track it down. I found it on the
Wednesday Chef blog, under recent posts. Don't hesitate to contact me if you can't track it down. One caller said you can get it direct from the Times. Good luck, its a great recipe.
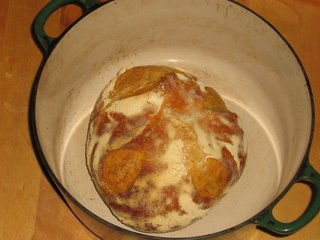
Hot from the oven - it crackles as if it were laughing.

Look at the spring on that loaf!
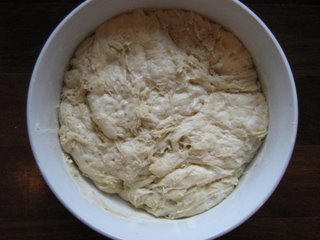
This is what the dough looks like after 18 hours of proofing. You turn it once or twice, let is rise some more, then pop it into a preheated dutch oven.
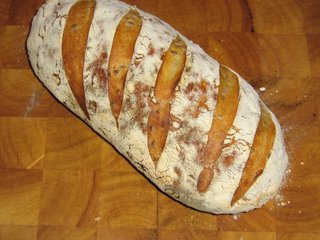
Light Sprouted Wheat Bread
This is a variation you can do with any simple white bread recipe you are making, if you have a few sprouted wheat berries kicking around like I do right now. Add a handful of the sprouted berries while you are adding the liquid to your bread recipe, and knead as usual. You will get a nice crunch from those baked on the crust, and a lovely popping soft crunch from the interior of the loaf. The following photo is the dough rising with the wheat berries showing on the surface.
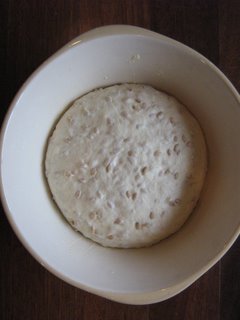
Light Sprouted Wheat Dough, rising